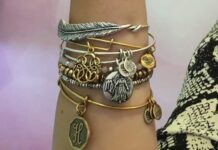
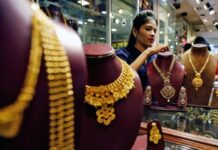
Every genre of photography is art, and mastering it takes time and resources. But how to describe photography of objects that catch and reflect the light with every bit of their surface, display delicate nuances of color and look totally different if you reposition them just a little bit? We call it photography of jewelry, and creating really impressive jewelry product photos requires lots of special skills and equipment.
Okay, maybe all these complications are required for renowned jewelry houses only, where egg-size diamonds and huge platinum bangles are sold? Well, it does not matter whether you are a sales director of Bulgari or an owner of a proud Etsy shop selling hand-made crystal pendants. You need to make your customers obsessed with your products, and the best way to achieve it is to provide great jewelry product photos that are true to life. Over-retouching or misguiding the customers about color or size results in returns and bad reputation of your business. But even if you are an Etsy seller with limited resources, it does not mean you cannot create good pictures that will pay the due to items you create.
Three Keys To Great Jewelry Product Photos
The process of making good shots of gemstones and jewelry comprises three main aspects. Omit one of them, and the photo shoot is bound to fail, unfortunately. So remember and explore in depth all three parts and pick the most appropriate options for your specific needs.
First key. Props and background.
Looking at many jewelry selling accounts on Etsy or Instagram you may think that a photographer just tossed the items on the first available surface and snapped some pics while sipping some coffee. The composition and background are fun but never obscuring the item, and the general feel is of ease and simplicity (mostly).
In reality, the creation of jewelry product photos is carefully planned and background is selected with almost scientific accuracy.
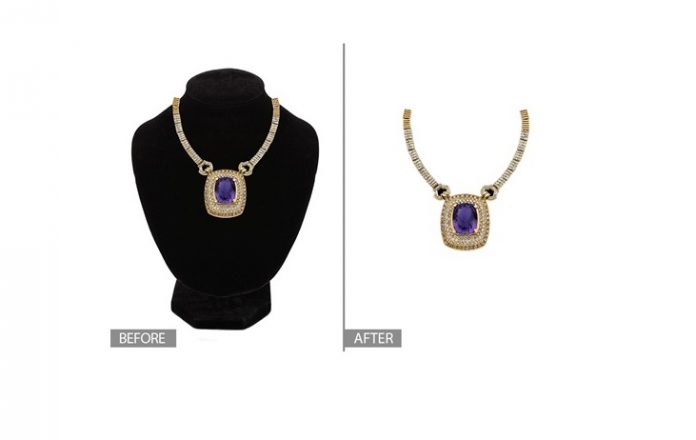
White background is the first and foolproof choice that pushes the item into the limelight. This background helps customers focus on the product solely and creates the fleur of high end quality (look up how the Vogue magazine presents its curated must-haves). White background also reduces retouching time and makes the page look neat.
Black background reminds of big jewelry shops where diamond necklaces are cushioned on black velvet. It also works well with precious metals and pearls. Black velvet or black mannequin on white background is your second best.
Creative and colored background can be fun, but consider if they won’t overshadow the item, especially a delicate one. If you opt for some specific background, stick to it through the whole photoshoot, and maybe in your whole account. Consistency in background will serve as an additional branding trick.
Props can be different, from roses and silk for engagement rings to some gothic stuff for ‘magic’ or ‘healing’ stones. Just do not overdo.
Second key. How to arrange jewelry for the shoot.
Ideas for shooting the jewelry collection depend on your resources and goals, but basically, you can shoot with props and a mannequin or on a human model. Lightbox for suspending a necklace belongs to the lighting section, but it is essentially a form of props because jewelry is placed inside the white box with evenly distributed lighting.
For jewelry product photos with a human model, you need, well, a model. Decide on appearance, clothing, hairstyle and makeup. The makeup should be minimal; otherwise it will overpower the piece or make it seem more festive or exuberant than it actually is.
Styling with props is limited by your fantasy only. Yet the most popular and ‘verified’ props and staging are as following:
– On ceramic tiles (matte or glossy), of neutral colors;
– Necklaces can be laid flat in circle around some thematic object (a bronze box, a small vase with flowers, cute ceramic pot, an orange, a pomegranate (split open), etc.);
– With some interesting shadows falling behind them (like ones from the sun oozing through vintage lace curtains or through latticed windows);
– Combine jewelry and food, typically fancy pastries;
– Use fabric (iron it before arranging). Silk or satin is the best choice;
– Place jewelry in something granular, like sand or brown sugar;
– Hang earrings or pendants on a fishing string against some fancy or white backdrop.
Third key. Equipment and lighting for jewelry product photos.
Of course, you can snap shots with your phone, but if you do plan to make money off it, invest in a good camera and accompanying stock. No matter the brand, just pick a camera that has macro shooting mode and adjustable balance of white feature. Remember that zoom has to be achieved through lens manipulation, not through digital zoom-in. So pay attention to the specifications of the lens, any 18-55 mm lens is OK for beginners. As you expand your venture, more capacious lens (or camera) may be required.
Tripod is a must-have to produce high quality photos. Even the slightest movement of hand can blur the carefully staged image.
Light tent for light dispersing, a good lighting fixture and maybe a lightbox will complete the equipment set. You may borrow a lightbox or make it yourself, it does not matter.
Now you are ready to shoot.
Postproduction is yet another chapter, and you may apply it for adding sharpness or removing shadows, or just go as is. The customer wants to see it real, after all.
In this review, we have provided the general guide on how to prepare for and conduct the shooting session, and if you plan to master this art in depth (and definitely make money through sales), conduct extensive research on professional jewelry product photos creation and follow the tips carefully.
Read Also : The Most Amazing Silver Accessories to Buy This Fall


